How to install Windows Template Library (WTL) in Visual C++ or eMbedded Visual C++
CESD|200275Applies To
- Visual C++ 6.0
- eMbedded Visual C++ 3.0
- eMbedded Visual C++ 4.0
- Visual C++ 2005
- Windows CE .net 4.1 Standard SDK
- Windows CE .net 4.2 Standard SDK
- Windows CE .net 5.0 Standard DSK
- Pocket PC, Pocket PC 2002, Pocket PC 2003, Smartphone 2003
- Windows Template Library (WTL) 3.0, 7.0, 7.1, 7.5, 8.0, 9.0, 9.1
Overview
This article outlines how to install Windows Template Library (WTL) version 7.5 into Visual C++, but the instructions are equally valid for any version of the WTL.
How To
To install WTL:
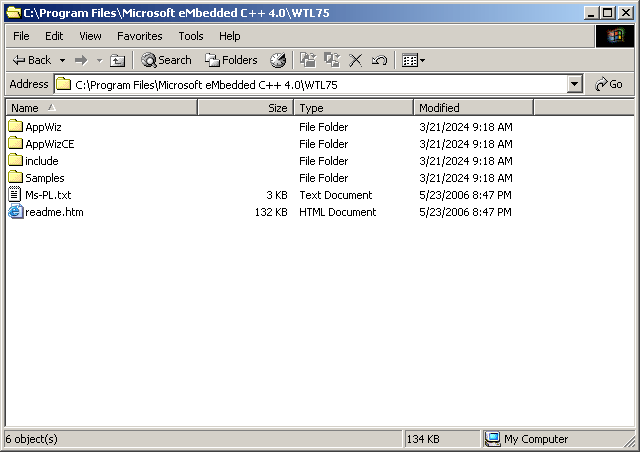
- Create a new folder named 'WTL75' within the same file system permissions scope as the rest of the Windows CE include files. For example, for eMbedded Visual C++ 4.0 create:
C:\Program Files\Microsoft eMbedded C++ 4.0\WTL75
- Extract the contents of WTL75.exe into the folder that you created in step 1
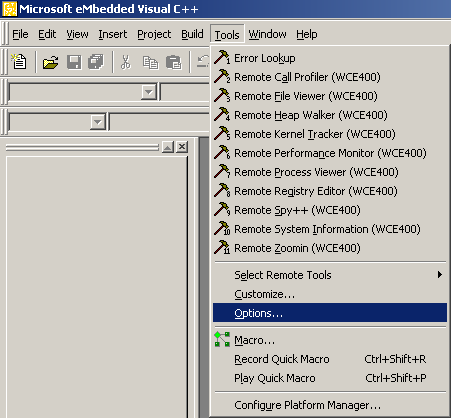
- Open eMbedded Visual C++ or Visual C++ 6.0 / 2005
- Click Tools > Options...
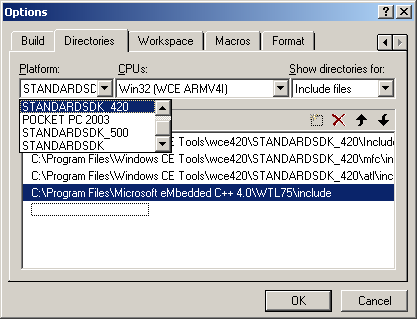
- Scroll along the tabs row until you find the Directories tab and click on it
- Ensure that the 'Show directories for:' drop down is set to "Include files"
- For each platform and then in turn each and every CPU associated with that platform add a new line pointing to the include sub-folder located in the path you created in setp 1 e.g.
C:\Program Files\Microsoft eMbedded C++ 4.0\WTL75\include
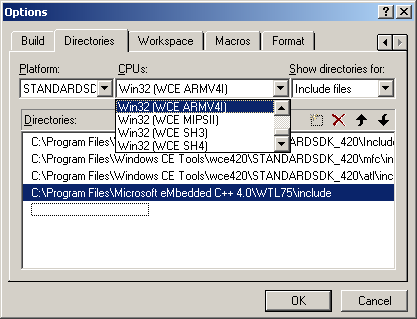
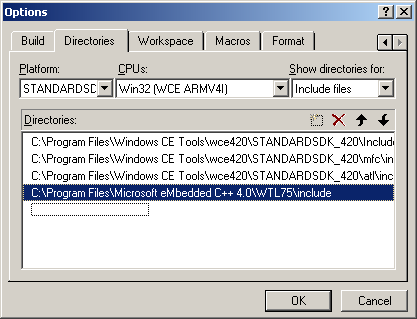
- Repeat for each CPU and supported platform
- Click OK to save changes and then exit Visual C++
Downloads