How to install a VNC Server under WindowsCESD|200046Applies To
OverviewIf you wish to connect to your Host system or a remote computer using the Virtual Network Computing (VNC) protocol you will need to install the VNC server on the target system. This beginners guide covers how to install the Windows VNC Server under Windows XP. The steps involved are identical under Windows 2000 and NT 4.0, however differ slightly from those listed under Windows 95, 98, 98SE and Millennium How-to GuideThis is a basic beginners guide on installing VNC Server 3.3.7. Securing VNC connections and more advanced server features are beyond the scope of this article. Should you require more advanced information on the use of VNC please see the RealVNC web site. A URL is available at the end of the article. System Requirements VNC Server does not require a very fast computer to operate. It will run under a 486 DX2, however you must allow for some increased lag between the system performing an operation and VNC displaying it. For optimal performance HPC:Factor recommends a PII 350MHz or higher. Download VNC Server is available for free from the RealVNC web site (Link at the end of the article). VNC is distributed under the terms and conditions of GNU General Public License. You must accept these terms before installing the software. The VNC package vnc-3.3.7-x86_win32.exe is a 600KB download. Installing VNC ServerOnce you have downloaded vnc-3.3.7-x86_win32.exe to your Host system or the remote computer that you wish to connect to. Double click vnc-3.3.7-x86_win32.exe to begin the setup process.
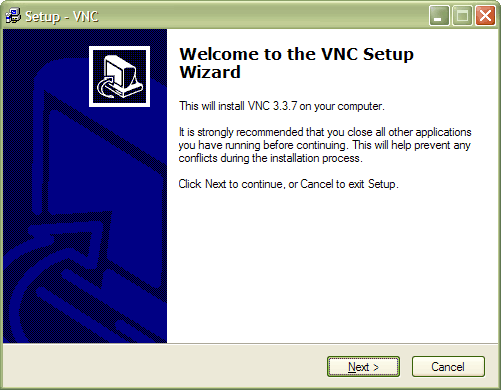
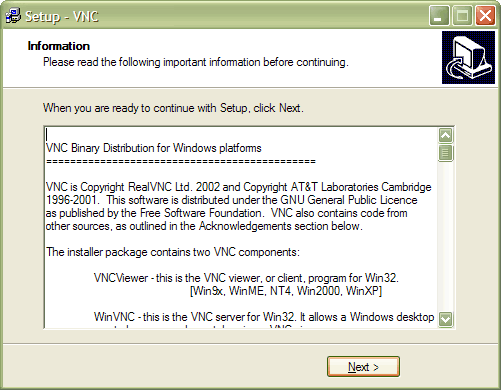
The VNC Installer will extract the installation files and begin the setup process. Click next when ready.
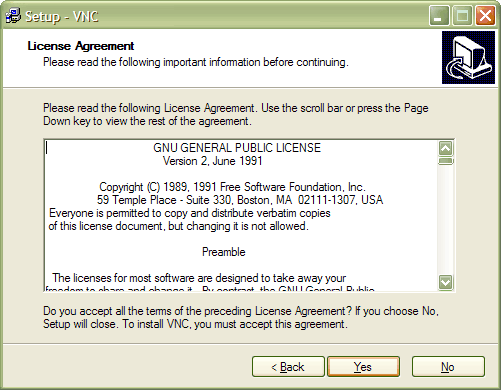
This is the GNU General Public License (GPL). If you are not familiar with Open Source software you should read this so you are familiar with what you can and can't do with the program. To continue click Yes.
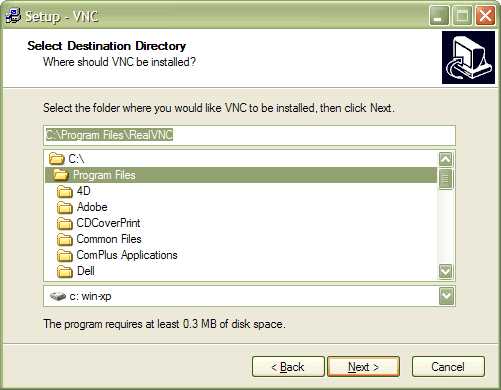
If you need to choose an alternative Installation Directory you can specify it here. We recommend that you keep the default installation path and click Next to continue
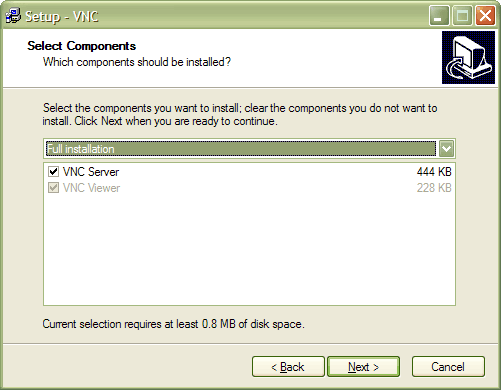
HPC:Factor recommends that you choose the Full Installation method. This copies the VNC Server and the VNC Win32 Viewer client for Windows 95, 98, 98SE, Millennium, NT 4.0, 2000, XP, 2003 to your computer. The total installation size is approximately 800KB. Click Next to continue.
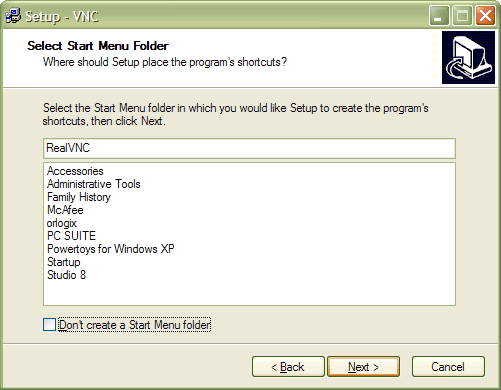
The next step of the installation process asks whether it should create program shortcuts in the start menu. If you select not to create shortcuts you will have to operate VNC using a Command Prompt. We recommend that you leave all settings here at their defaults.
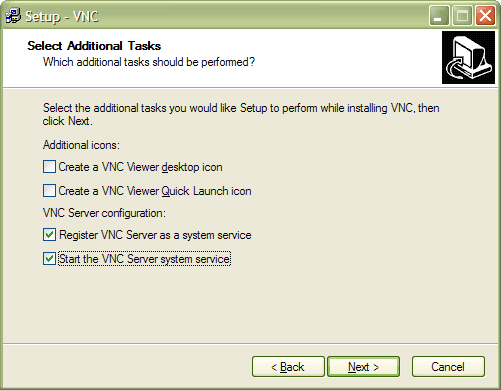
The Additional Tasks options screen allows you to answer some important questions with regards to how VNC will function. Additional Icons VNC Server Configuration The 'Start the VNC system service' option will load the VNC System server as soon as the installation is complete. This allows you to connect to the Host system as soon as setup has completed. Click Next when ready NB: Under Windows 9x you will not be given the option to register VNC as a system service
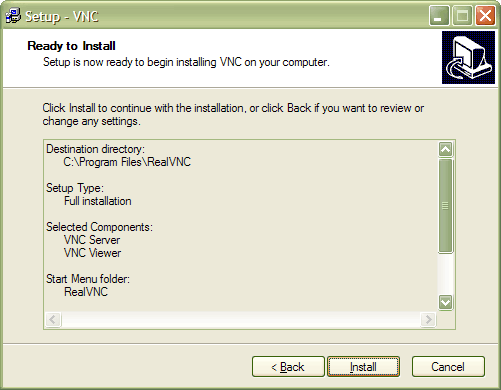
The final screen allows you to recheck your installation options. Click Install when ready.
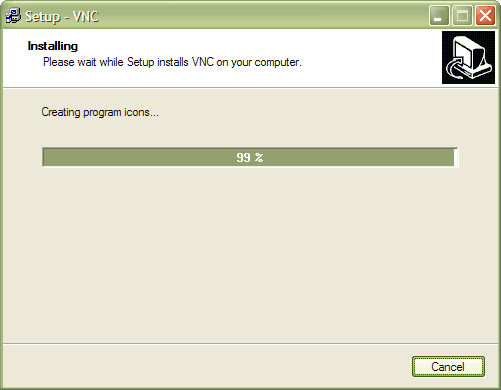
VNC Server will now be installed onto your computer. It may take a couple of minutes to complete.
Once completed the Readme file for VNC is displayed. This contains last minute information about VNC as well as copyright and support information. Click Next to proceed.
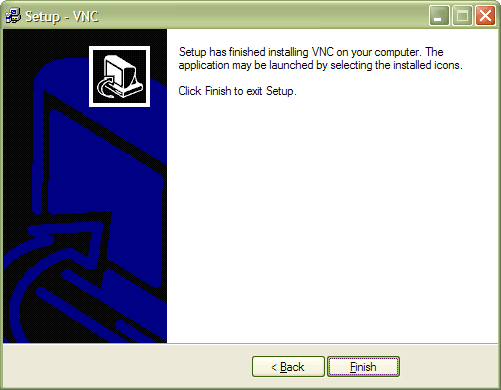
VNC Server is now installed on your computer. Click Finish to exit the installer program. NB: If you specified to Start the VNC Server System Service several screens may flash up momentarily. This behaviour is expected.
If you specified in during the setup to start the VNC System Service you will be presented with the above dialogue box. If you didn't you will see this box the first time you launch the VNC Server program from the shortcuts in the Start Menu.
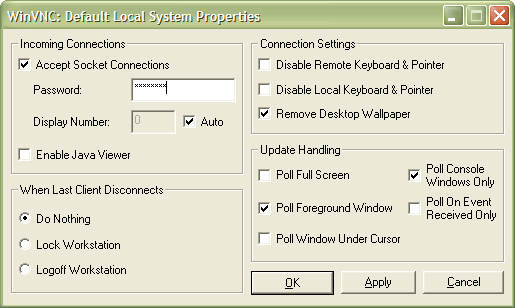
This is the main control panel for the Windows VNC Server. If someone is able to guess the password then they will have full, anonymous access to your PC HPC:Factor recommends that you remove the check box from Enable Java Viewer. The Java viewer allows you to access your PC remotely using a web browser. This functionality is not available to Handheld PC users and will not be covered in this article. For security we recommend that you disable it. The 'When Last Client Disconnects' option only works under Windows 2000, XP and 2003. It allows you to automatically force the remote workstation to lock or log-out when the VNC session is terminated. 'Connection Settings' contains options for how the VNC session will be controlled. For example if you only want people to be able to observe the remote workstation then you can disable input from the remote system. You can also prevent input from the local machine if you don't wish people physically at the workstation to use the PC while you are connected. Choosing to disable the Desktop Wallpaper will speed up the desktop navigation especially over slower connections or on older HPC's. When VNC running correctly the VNC icon in the system tray will have a white background. When a client is connected to VNC the icon will have a black background. VNC is now configured and ready to accept incoming connections from your Handheld PC. See AlsoRealVNC Home Page: http://www.realvnc.com/ |

