Programs developed to help NSbasic programmers to visually create code for any standard message boxes
You must be registered and logged into HPC:Factor in order to contribute to the SCL.
Screenshots & Images
Description
Features : Programs developed to help NSbasic programmers
to visually create code for
- any standard message boxes
- standard input box or full screen input box(PPC)
- objects'arrays with customizable properties and
with customizable objects' position and dimenzions
include also an archive of NSbasic keywords and
a list of commom error code numbers and the ability
to store and recall to paste cunstomized user's code.
Here is the first helper for the NSbasic CE developers that
with the Vers.2.0 help ypu better with new features.
TWO WORDS ABOUT THE PROGRAM.
The target was to create a program to support the user to develop applications
quickly, using it to get authonatically the needed code.
The program runs on HPC and PPC units even if the Hpc are the preferred unit
to develop code owing to the presence of the keyboard.
Now, as also the PPC version program is available it will be more easy to write
the code to use by a Palm PC as this program can enable the users of this
unit also to create their applications quickly even if they are missing of a true
keyboard as with few taps the progra writes the code for them.
To install NSassistant (nsassist2_2.zip)
As many programs of mine, to install NSassistant also
you need only to unzip and to copy the file you need
into the folder you like (it may be /storage card also).
The program uses NSruntime, but being developed for
who uses NSbasic CE i assume that they should have this
file currently installed on their system.
To start program tap on its name or create a link.
And now.... NSassistant2
When you start the program you see the windows below :in HPC pro e PsPC
If you read the page under GUI button you may find a detailed description about the
construction and use of a windows such this.
Anyway you find 4 objects at the respective windows' corners, a central panel ( not really
at the center) and a free space on the right. The combobox on the right is the basic
command to use as the only instruction you find on start is to 'Select an Action in the
above ComboBox. Opening it you get 3 options:
Keyword/Code
Msg_box Code
Objects array Code
These are the 4 basic functions of the program.
Clicking on first option you will see the following window.
To use this window is very easy.
Open the combobox, select a Keyword/code cathegory. tap on it and you will see in the
list below all the requested keyword. Highlight the one you need, press 'Copy Kweyword'
button and when prompted press CTRL+C to copy it into the Clipboard and, thence paste
it in your code.
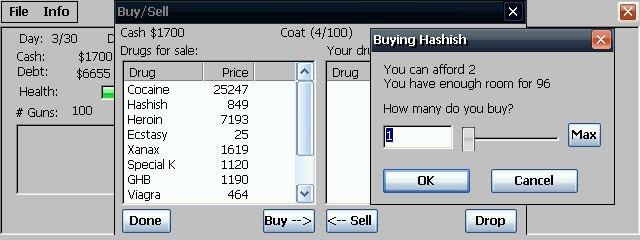
The next Option is Msg_Box Code that shows the following windows.
To use this windows it is equally easy, even if you have to make some additional selections.
First select the Message type (I.E. standard msg, message windows or input windows)
thence you may choise a selection buttons' number and type, the default button and the
required icon for the window.
Write window's title and obviously the text (you may write up to 6 text's lines) and the
Default value if you need an input box (Note that only the fields you needs will be shown)
Press preview the result, close it and, when prompted, press CTRL+C to copy and thence
paste the created code.After pasting code complete it with your executable code
The last option is more complex
It is not difficult to use but you have surely many selection to do to create an Objects'
Array. First you have to select what kind of object to use in the array.
You can use: Command Buttons, labels, Option Box, or Check Box, Textbox etc
Tap the relative option and go to define position and dimension of the start and the items.
Selection is done using the common NSbasic values Left,Top,High,Width (you may
correct the default values)
You see on the right another input field also called Spacer. If the value of this textbox is 0
(default) all the objects will be shown side by side. Increasing the spacer value you will put
some more space between the objects.
Now indicate the Number of the objects of the array and establish if show them vertically
or horizontally as in the previous version but now you can also the custom option.
One Command button has been added to the relative window and now this new button instead
of the Spacer windows is shown if you select Custom instead of Vertical or Horizontal objects'
display. When the Customize Button is visible you see also the input windows above (Top,Left,
Width and High) blanked and you can insert the relative values for the object shown in the button
caption (Obj n.1 , Obj n.2 e so on).
When the Custom button caption reachs the number of objects selected the button hide.
By this option you will be enabled to create for esample four objects joined in an array but
located at the four windows' corners and anyone with its own dimensions.
We are at the end. If you wish you may select the check box to add two furher
cunstomizable properties equals for all the objects created.
Obviously you have to use Creata Code and thence CTRL + C button to copy the code and
paste it as above
The program works exactly as the HPC version. All the input text's
fields have been moved on the top area of the screen to enable
the user to clearly see what he is writing even if he use the virtual
keyboard.
To get the most from the use of the program i suggest:
1- Use always the same way to name your object and common
Variable (sample Lbl1,Lbl2,Lbl3 for labels or Id1,Id2,Id3 for
functions' index) so any segment of your code will be able to
run immediatly in your program as soon as copied.
2- Store the exential function (i mean Open file, Read file,and
so on) to be able to copy the common parts of your program
directly from you stored code. So doing you will need only
to write the cunstomized lines of code to complete you new
program.
And NOW is available also something to correct The Input Box Bug
(Win 2.11).for Palm size units.
As now the DialogX dll represents integrating part of NSbasic Vers. 3.0 so
NSassistant2 use this, if you install it on a palm PC, to create input boxes
full screen as used in WinCE 3.0.
The user does not have anything to do except to confirm, when prompted, that
the required Dll is installed on his unitCE.
After the reply all runs as usually and you can preview the Input screen and
thence copy the relative code into your program.
ATTENTION : When you copy the code an instruction ' ADDOBJECT "DialogX ....'
is added to your code. If you use more than 1 inputbox segment of code, created
by NSassistant2, you have do Put that line at the end of the code one time and
cancell any other occurrecies that you add copying further inputboxes code's lines.
Installation Instructions
The program may be used on PsPC/PPC units loading the 'P' version and
on HPC/HPC Pro units loading the H version.
Copy the file's program into any folder of your unit.
Check that the NSbasic runtime is installed on you unit.
As the program is dedicated to NSbasic newbies developers i think
you should have it, if it is not so, download it from the NSbasic.com
site and install it. (the autoinstalling program will install the
proper version for the CPU unit that you use).
The program require the full version of NSbasic CE but the runtime
enable both the NSassistant and the NSbasic IDE to be active at the
same time.
Tap on the NSassistant file name to run it and thence run your NSbasic
program's IDE and load your current project and you are ready to work.
When you need, tap on the taskbar NSassistant icon to get the program
on top of your screen.
You will see three command buttons and a combobox at the corners of the
screen with a panel in the middle.
As shown in the label select in the combo box the action you like and
the following will happens:
KEYWORD/CODE
--------------------
You will see in the central panel a combo and text box. Select using
the upper combobox one of the Keywords category you want and you will
get immediatly on the box below all the keywords concerning.
You may now highlight one of them and, after pressing on the Command
button [Copy Keyword] in the left corner below, you can using CTRL+C
to copy the keyword into the clip board.
Return now to your project and IDE screen, taping on the relative task
bar icon, select the line you like and tap Paste in the IDE menu items.
I understand that to write the word is usually more speedy but if you
dont remeber it .... it may be useful.
In the same way you may see the error's codes but in this case you
cannot copy them.
The added funtcion help you to store any code segment that you like.
Tap button [Write] and the combotext and textbox will be cleared.
As prompted by the label quoting [Code's Title] write the title in the
combo text and thence write the code text into the multiline text
below closing each line by [Enter].
When done tap the button [Store Code] (previous caption copy keyword)
and your code will be memorized in a file in your Temp folder.
To read back the code stored pull down the combo list, select the line
"My Code" (the combolist close itself) pull down again the combo list
and you will get following the selected My Code line all the stored
code's titles. Tap on the one you like and you will see the code text
shown below the combo box. You may now tap [Copy Code] and thence the
usual CRLT+C to send the text into clipboard.
MESSAGE/INPUT BOXES
-------------------
Also the code for message and input boxes is easy to write... if you
know and remember codes and sintax correctly.
If it is not so use the program that will show you the following:
- three option button to select the type of box
(I.E. Simple standard message box, message boxes with selection or
Input boxes with preselected default value if you wish)
- three combo boxes that allow to select Buttons' type, default button
and icon to show in your message box
(these ones are shown only if you select 'message box' that is the
default choice on starting)
- Textboxes that ask for the Title and Text of your box and the default
value for Inputbox if any.
Please note that, in the textbox, you may to insert up to 5 lines
of text to compose your message. Use enter to go to the next line.
- There is also a check box to have a modal msgbox, usually unchecked.
Select the type of messagebox or input box, complete title, text, add
icon, default button or value. When you are ready tap the button on
the left below with caption 'Preview' and you will see on the screen
your message or input box.
If it is as you like close the box's preview and you will be prompted
to use CTRL+C to copy the code.
As above paste the code into the IDE windows and add your code to
to customize it as you need.
If you do not obtain immediatly the window you like, after unloading the
preview do not use CTRL+C and simply change what you want, thence retry.
In this version the option inputbox allows two type of input boxes.
The usual input boxes in its own windows or (if you run Pocket Pc) the
program allows a full screen input box (as NSbasic 3.00 has DialogX included)
OBJECTS' ARRAY
--------------
This third option may be surely useful as it is not so easy write on the
fly the code to obtain the whished result.
You have to indicate more selections than with the above action but it
enable you to create a more coplete object array.
For the ones that do not need a customized result, without changing
the defaul values, only add the number of objects required, if they
must be shown vertically or not and pressing 'Create Code' button
you will be ready to copy with the usual CTRL+C the code into your
project.
Otherwise select Object type first, Then modify the position and the
dimensions default values, change the '0 ' value of the spacer box
if you like to insert more space between the objects.
Insert the number of object you need and the display mode (vertical or
horizontal).
I suggest to follows this sequence to select the items.
You may also check/uncheck the adding of further common properties.
This is optional and add the FontBold and Forecolor property to your
code.
Press 'Create Code' button and you will be prompted to use CTRL+C
to copy code.
Paste the code into IDE windows and you will get the object array.
You may change now the following items:
- The caption of each object (changing the item number with a string)
- Insert the code to execute when the relative object has been selected
(The procedure is a 'Select case' and you have to insert 'Case 0,
Case 1, Case 2 and so on with the code for the relative array items)
- Modify FontBold and Forecolor properties if you added then on code
creation time.
In this version a new option has been added to get Custom objects' array
Select Object's type, Object number and thence the option Custom.
You will see the top,left,width, high input text boxex blanked and a
new command button shown on the screen.
The Button caption quote the object no for which you have to insert
coordinates in the text boxes, as soon as done press the button and
you will be prompted to insert data for the next object.
After the last object the button hides and you can press the command
'create code' and copy and paste it as usual.
NOTE and Bugs:
If you used Visual Designer to compose your GUI the code created by
NSassistant must not be added to the **generated code** being not
recognized by this tool.
The program help you to not require objects array that may go out of
the current screen space. If you wish you may anyaway adjust dimensions
and positions changing values of Addobject manually in the copied code.
Put the NSassistant code out of the Visual Designer code and Hide/show
the relative objects separately if you need.
Note that on PPC version all the Text input's fields are on the screen
over the keyboard space to allow user to read the input text.
The new function to create customized object's arrays does not use
any control procedure so check well the data inserted to avoid that
some objects may go out of screen.
I consider program still in development so you may meet some bugs.
Please kindly report any problem to enable me to adjust the matter
Thanks to try NSassistant Vers.2 by EFsoft
The program may be used as is, FREEWARE for personal use only and
without any responsability inplicit or explicit for any damage that
may arise from the use, wrong or correct also, of the program itself.
History: Created Vers.0.1 adding the function to create Objects'Array
and to check Errors Code and copy Keyword to my previous
program developed to create code for MsgBoxes only.
Update Vers.0.2 to correct some minor typewriting english
errors, an error code line shown wrongly in the list and
a bug causing an error using a button without selecing an
item.
Upgrade Vers.1.0
Added a file .htp with sintetic instructions.
Updated this file Readme
Added to the Keywords window (now called Keyword/Code) the
function to memorize user's code and to recall the code's
segments memorized to paste them into the NSbasic IDE.
Effected the porting of the program on PPC units under
version 0.1P with the same features of the version 1.0
for HPC.
Created Version 2.0 vor both Hpc and Palm size PC units
(pocket Pc included). Added the customizable dimension
position objects array function for all type of CE units
and the alternative full scree input box (for pocket PC
type only)
Tags
Programmingnsbasic
| |
|
| License |
Freeware The program is completely free to use. |
| |
|
| Website |
http://spazioinwind.libero.it/efsoft/
Not working? Try this website on the WayBack Machine
We believe this app can be obtained directly from its developer!
|
| |
|
| Popularity |
2997 |
| Total Downloads |
0 |
| |
|
| Submitted By |
torch |
| Submitted On |
02 November 2022 |
Comments
No comments have been submitted against this application. Be the first!
You must be signed-in to post comments in the SCL. Not registered? Join our community.
Software Compatibility List: The SCL is provided for free to the Handheld PC Communty and we do not carry advertising to support our services. If you have found the SCL useful, please consider
donating.