The CeOpener Experience: Tapping into Sharp Brain's WinCE desktopRoy Chan | Guest Reviews Roy Chan This article is a companion to my review of the Sharp Brain PW-A7000, if you haven't seen my review and are not familiar with the PW-A7000 I suggest familiarising yourself with the Sharp Brain and its software limitations first. Review: Sharp Brain PW-A7000 In its default state, the Sharp Brain excels as a Japanese language dictionary, but for the inquisitive Windows CE user, the custom Japanese language shell masks many of the expected Windows CE features and functions. Despite this, there exist a few programs that can tap into the Windows environment of the Sharp Brain electronic dictionary unit. These programs allow you to easily recover much of the functionality that a typical Handheld PC user would expect to see in the device.
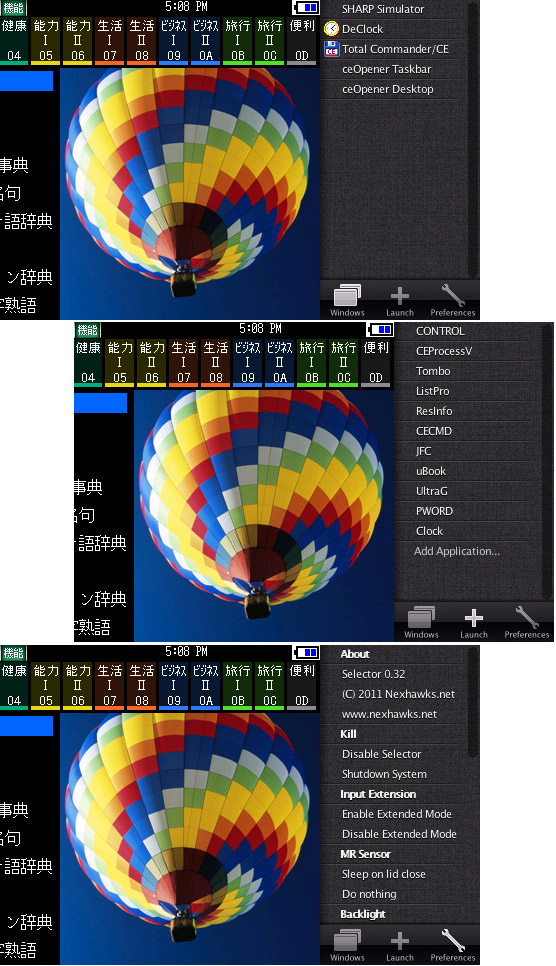
Of the four app's, I prefer this as it offers a full windows CE desktop, with the usual Start key, taskbar and running app's tabs; and it is CeOpener that I now focus on. 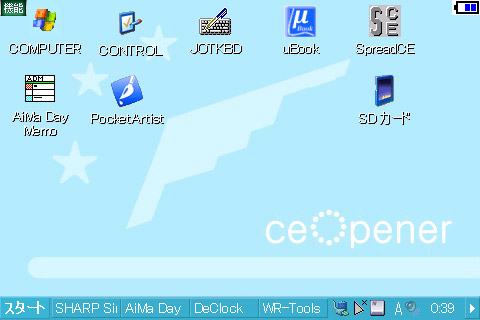
By default, My Device and Control Panel icons appear on the desktop. Touch-and-hold anywhere on the desktop, to pull up the three item menu with the following: Arrange Icons, Add Shortcut and Customise Desktop Once you have downloaded CeOpener, you must rename the executable to AppMain.exe. Next, make a zero-byte dummy file named Index.bin and place it next to the executable. App's that you need to add to the Brain must each be contained in a folder named identically to the app itself, and copied into a folder named APULI located at the root of a micro SD card (APULI are three Japanese Katakana characters, literally meaning 'applications'). NOTE: you may want to ask; for those who didn't have or know Japanese IME, how do you name a folder with those 3 square boxes? In my case, I unzipped the ceOpener content using a regular PC and found a Japanese readme file. Opening the file reveals instructions to install, you just need to copy the text to Google translate to get an idea about using the 'APULI' folder. Find them, copy , make a folder in your SD card and paste in the content to get the folder. 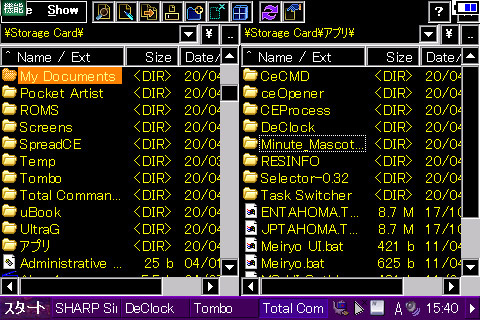
This renaming-and-putting-a-zerobyte-file-into-a-samename-folder procedure has to be applied to each and every app which you want appear in the default "Add App's" list. This allows you to create a base set of programs that will enable you to launch a CE desktop environment. Any other Windows CE app's do not need to reside in the APULI folder once you successfully get the desktop up and running. Once you have setup the correct folder structure, and inserted the SD card into the Brain, a reboot will enable the device to recognise the app folders, and a list of the app's show up in the Add App's page. At this point you have the option to leave the 'APULI' folder on the SD card or copy it to the NAND3 partition (using any file manager like windows explorer or CeCMD). In the middle of the top bar in app's list, a two-character menu toggle displays the list of app's saved in NAND3, if any. 
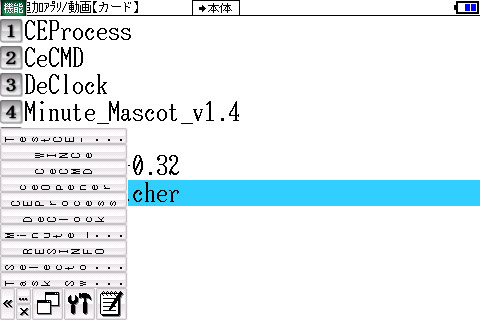
App's that I tried with the renaming method and copied to the 'APULI' folder and worked as expected were:
I have yet to try copying other app's to the APULI folder to see if they worked the same way. I won't go into detail using the above app's, however slowly but surely that nostalgic Windows CE desktop is starting to resurface. Loading CeOpener makes everything a lot easier, because you can assign shortcut key combinations to execute app's located elsewhere on the micro SD card. You can even put shortcuts on the desktop itself. Which is my preference for using CeOpener. At this point, it is suggested that you perform some translation steps on the main user interface. Starting from the Home screen, click on the Add App's icon (rightmost item in the second row) and it brings up the list of app's copied earlier to 'APULI' folder. 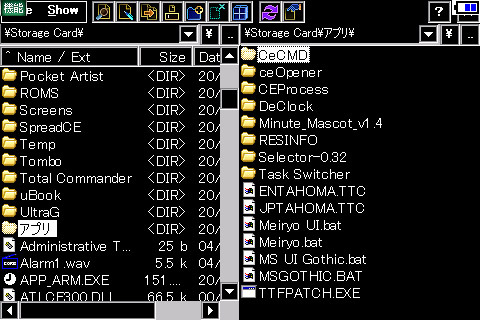
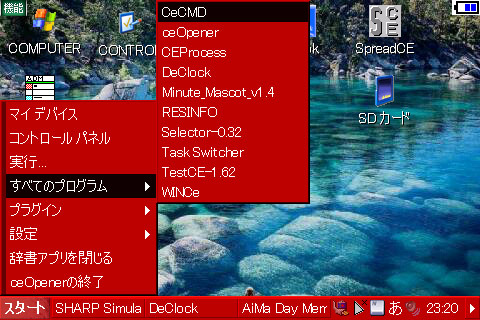
Load Taskswitcher, click on the last icon to reveal a menu, and then run 'TTFpatch'. You may then exit Taskswitcher, or just leave it running in the background. Next, click on 'CeOpener' and a prompt will says 'Please Wait'. 3 seconds later you hear that familiar Windows startup sound, and voila! I guarantee a smile on you face as the familiar START button and taskbar appear, together with a desktop wallpaper. The Start button opens a menu with 8 items in Japanese, they are:
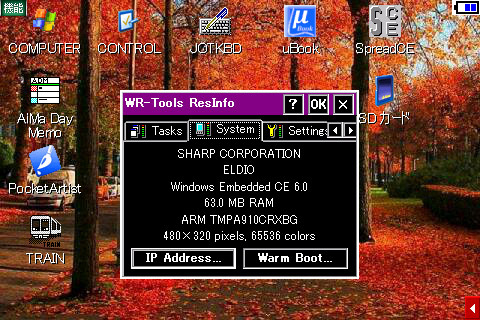
On the next menu are Input switch settings, plug in keys binding, openershot settings and power options. Input switch settings allows you to enable or disable a) use sub-display for input, b) full use of sub-display for 2nd generation Brains and , c) disable input switch functions when Dictionary is in-focus. Plug in keys binding allows you to assign commands or key combinations to most of the hardware buttons (and a few touch keys on the left of sub-display), over-riding the default presets. As mentioned in the previous paragraph, you can choose to enable or disable personalised key-bindings whether or not 'Sharp Simulator' is in-focus. With exception to On/Off, S-Jump, Back and Enter, all the hardware buttons can be assigned with two key bindings, with and without a Function key combination. 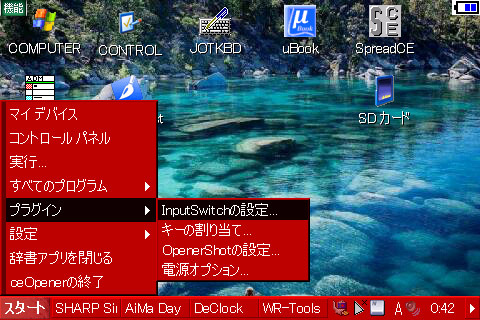
The alphanumeric buttons are also assign-able with key bindings, except in most use cases you won't need to do that. Openershot settings lets you set the default folder to save screenshot files. By default, a 'screens' folder is shown, but if you intend to use that, be sure to make a folder with that name on the SD card, or you will receive an error message when you execute the screenshot key(s). What keys? Keep reading! Finally Power options allows you to adjust back light level, CPU speed, and choose whether the unit suspends, dims the screens or switches on upon opening the display lid. The next menu, Settings for CeOpener brings up two items:
Note: some of the above input switches are pre-assigned with key combinations, which may be modified according to one's own preference. Key bindings are automatically saved to a file named keybinding.key. This can also be exported as a backup to any other storage location, for later restoration, just in case. Knowing that a lot of customisation could be done catering to one's liking, the procedure of replacing deleted batteries is rather frustrating. The only way to circumvent this shortcoming is to plug-in external power while replacing the batteries; which kept all of my settings intact. Another option is to use regedit.exe to export the system registry beforehand, and restore it back just in case the inevitable happens. Now for the interesting part. If you intend to make use of the unit's hardware keyboard to do some serious typing. Beware! There being no spacebar, comma, period and - as mentioned in my preliminary review of the Sharp Brain - while Sharp did include a space button in their third and fourth generation models - typing in English is near impossible as a result. The biggest surprise CeOpener gave me was that, the hyphen button which originally required the S-Jump key press combination to insert a space, no longer works. In fact, the Description button acts like a space button as well. The hyphen button now needs a Function key press together to generate that hyphen. All these changes because of CeOpener. CeOpener also modifies some other key combinations:
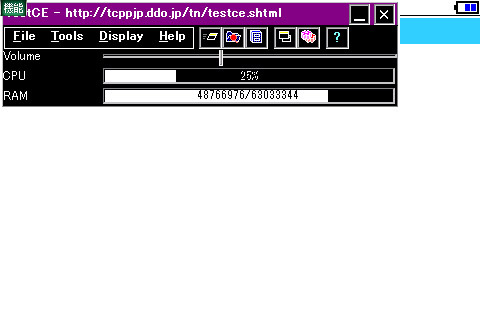
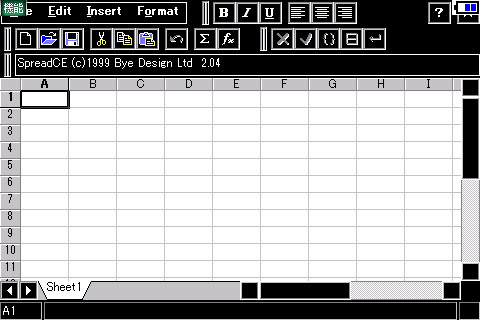
So with some persistence ad trial and error, I've managed to make most of the usual Windows combination keys come alive. Installing other Windows CE app'sThe Wceload.exe and Cabinst.exe installer runtimes do no install cab files successfully every time. After some frustration, I finally found that the easiest way was to install those app's on another Windows CE machine, and then transfer the whole program folder (with contents) to the micro SD card before launching .exe files directly. After some testing, here is the list of the programs that I could run properly using this method:
Similarly, using the same technique it was possible to get some Pocket PC app's and games to run smoothly, including:
I am still trying to get Yamace to run Gameboy ROMs, but to no avail as it keeps crashing with GXOpenDialog errors. CeOpener does not attempt to resolve the issue of PIM. PIM functions (contacts, calendar, tasks and email) are not available at all on the device, as the application files, DLLs, databases and other Windows CE components are missing. It is however not out of the question that there is this hope that other tech-savvy fans may be able to figure out what is required and get these - and other other CE app's to run. Who knows, someone may even get it to sync with a PC! Want to let us know what you think of this article? Let us know your thoughts on "The CeOpener Experience: Tapping into Sharp Brain's WinCE desktop" in the discussion therad in the Community Forums!Tags | CeOpener Editorial Sharp Brain
|